Sometimes a form needs more than typed answers, it needs a file: a resume attached to a job application, a photo with a support ticket, a signed PDF on an intake form, a logo on a design brief. A file upload form is how you let people send you those files without email back-and-forth. This guide explains how file upload forms work, walks through the plain-HTML, Google Forms, and WordPress routes, covers the file-type and size limits that matter, and is honest about what upload security does and doesn't mean. By the end you'll know which approach fits your situation and how to ship one quickly.
What Is a File Upload Form
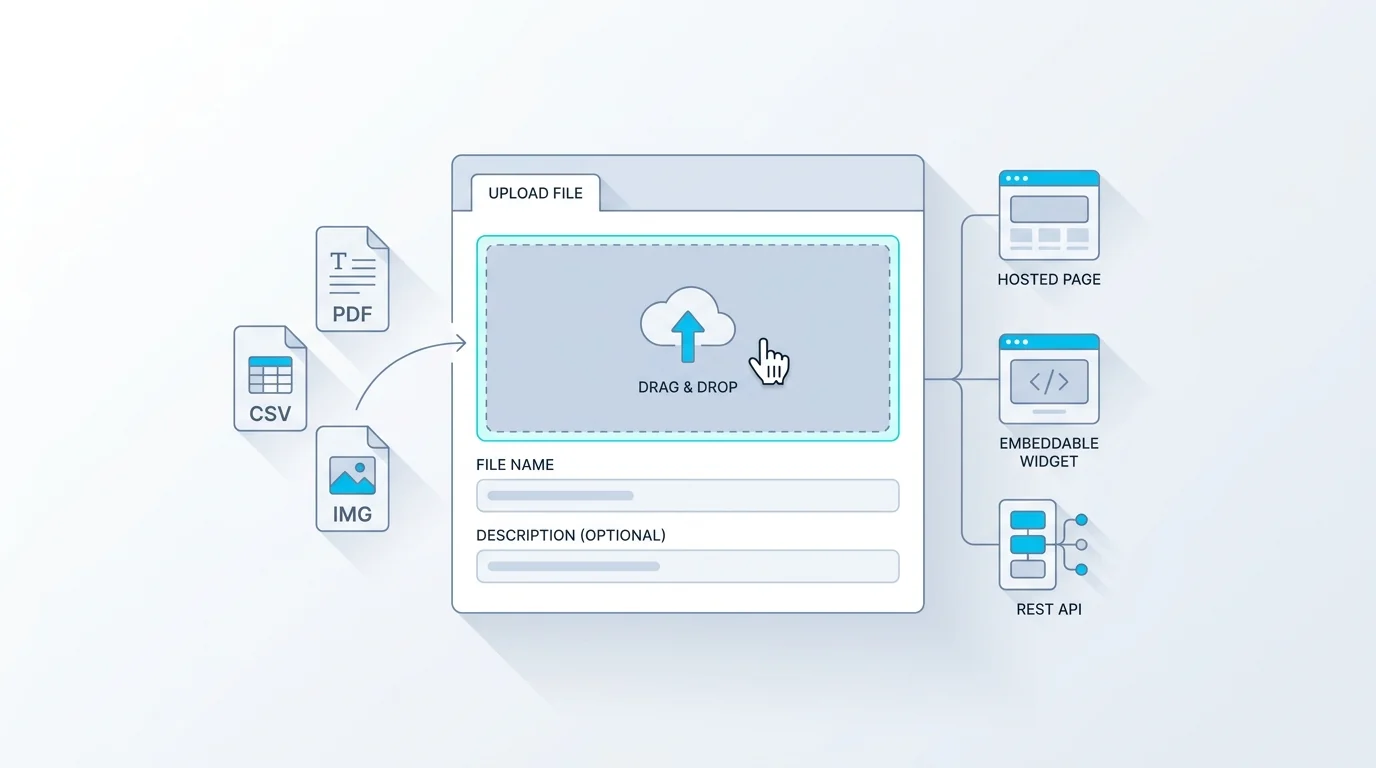
A file upload form is a form with a file field, a control that lets respondents attach one or more files (documents, images, PDFs) along with their other answers. When someone submits, the files are uploaded and stored somewhere the form owner can retrieve them, usually a dashboard, a cloud folder, or a notification with download links.
It solves a specific, common problem: collecting files from people who aren't in your systems. Instead of asking applicants to email a resume or customers to message you a screenshot, you give them one form that captures both their information and their files in a single, organised submission. The result is less back-and-forth, files tied to the right record, and a consistent place to find everything. The rest of this guide is about the different ways to build one, from raw HTML to a hosted form builder, and the trade-offs of each.
How a File Upload Form Works
Under the hood, a file upload form relies on a single HTML element and a specific way of sending data. The file field is <input type="file">, which renders the familiar choose-a-file control (and, with the multiple attribute, lets people pick several at once). The important detail is the form's encoding: to send files, the form must use enctype="multipart/form-data", which packages each file as a separate part of the request rather than trying to cram it into a normal text submission.
When the form is submitted, the browser sends that multipart request to a server, which receives the file, writes it to storage (a disk, or more commonly cloud storage like an S3-compatible bucket), and records a reference to it alongside the rest of the submission. The form owner then retrieves the files, by downloading them from a dashboard, getting them in a notification, or syncing them to a folder. Every file upload form, however it's built, follows this same shape: a file field, multipart encoding, server-side storage, and a way to retrieve. The differences between approaches are who handles the storage, validation, and retrieval, you, or the tool. The canonical technical references are MDN's pages on the file input and sending form data.
It's worth understanding why the encoding matters, because it's the part people miss. A normal form submission sends text as key-value pairs, which works for names and emails but can't carry the raw bytes of a file. The multipart encoding solves this by splitting the request into parts, one per field, so a file travels as its own binary chunk with its filename and type attached. Get the encoding wrong, by leaving it as the default, and the file simply won't arrive: the server sees only the filename as text. That single attribute is the difference between an upload that works and one that silently fails.
How to Build a File Upload Form in Plain HTML
If you control a web page and a backend, the markup for a file upload form is short. Here's a minimal example that accepts a single PDF:
Three things make this work: enctype="multipart/form-data" (so the file is sent correctly), type="file" (the upload control), and the accept attribute (a hint that nudges the file picker toward PDFs). Add multiple to allow several files.
The catch is everything the markup doesn't do. The HTML only collects the file in the browser, you still need a backend at /upload to receive the multipart request, write the file to storage, validate it (type and size), guard against abuse, and give you a way to download it later. That's real work: you're responsible for storage costs, security, virus considerations, size limits, and retrieval. Note too that the accept attribute is only a convenience, it does not enforce the file type, so a determined user can still submit something else; real validation must happen on your server. For a one-off on a site you already run, raw HTML is fine. For anything you don't want to build and maintain, a hosted form handles the storage, validation, and retrieval for you, which is the trade-off the rest of this guide weighs.
It's also worth knowing the browser-side niceties you get for free and the ones you don't. You get the native file picker and, with the multiple attribute, multi-file selection; you don't get progress bars, drag-and-drop, image previews, or client-side size checks unless you add JavaScript for them. Those touches matter for a polished public form, which is another reason teams reach for a tool once the upload is more than a quick internal utility.
How to Add File Upload to a Google Form
Google Forms supports file uploads with one significant catch. To add it, edit your form, add a question, and choose the File upload question type; you can set the allowed file types, the maximum number of files, and a size cap. Uploaded files land in a folder in the form owner's Google Drive, which is convenient if you already live in Google Workspace.
The catch is the sign-in requirement: respondents must be signed in to a Google account to upload a file. This is a frequent frustration, it's the reason people search for ways to accept Google Forms uploads without sign-in, because requiring a Google login adds friction and excludes anyone who doesn't have (or doesn't want to use) a Google account. For an internal form where everyone's on Workspace, it's a non-issue. For a public form, a job application, a customer request, a lead magnet, it can cost you submissions, and there's no native way around it in Google Forms itself. That single limitation is what pushes many public-facing file upload forms to other tools.
A couple of other Google Forms limits are worth noting. Uploads count against the form owner's Google Drive storage, so high-volume file collection can eat into your quota, and the file-type and size controls are basic compared with a dedicated tool. None of these is a dealbreaker for internal use; together with the sign-in requirement, they're why Google Forms is best for internal file collection and weaker for public-facing uploads.
How to Add a File Upload Form in WordPress
On WordPress, file uploads come via a form plugin. Most of the popular form plugins (the well-known ones in the WordPress ecosystem) offer a file-upload field, sometimes on paid tiers, that stores uploads in your WordPress media library or a designated folder and attaches them to the form entry. The setup is generally: install the plugin, add a form, drag in a file-upload field, configure allowed types and size, and place the form on a page.
The trade-offs are worth knowing. A plugin keeps everything inside WordPress, which is tidy if that's your stack, but uploads then consume your hosting storage and the file-size ceiling is bound by your server's PHP upload limits (which you may need to raise). You're also responsible for keeping the plugin updated and for the security of files sitting on your host. For a WordPress-centric site this is the natural route; if you'd rather not store files on your own hosting or wrestle with PHP limits, a hosted form embedded into the WordPress page keeps the files (and the size limits) off your server.
File Types, Size Limits, and Security
Three practical questions decide whether a file upload form is safe and usable: what types you accept, how big files can be, and what security actually covers.
File types. Restrict uploads to the types you actually need with a MIME allow-list, accept PDFs for a resume, images for a photo upload, rather than allowing anything. An allow-list is both a usability nudge and a security measure, since it narrows what can be sent. Remember that the browser's accept attribute is only a hint; enforcement has to happen server-side.
Size limits. Every upload form needs a per-file size cap, both to control storage costs and to stop oversized uploads. Sensible defaults are a few megabytes per file for documents and images, with a higher ceiling only where you genuinely need it (high-resolution images, large PDFs).
Security, honestly. This is where it pays to be precise rather than reassuring. Good upload hygiene means storing files safely, sanitising filenames (so a crafted name can't cause problems), recording a checksum to detect corruption or tampering, and limiting abuse with measures like a honeypot, rate limiting, and a CAPTCHA. What it does not automatically mean is antivirus scanning. Many hosted form tools, ours included, do not run a malware scanner on every upload, so you should not assume an uploaded file is malware-free just because it came through a form. If you accept executables or Office files from the public and need scanning, run uploaded files through a dedicated malware scanner in your own pipeline before opening them. OWASP's File Upload Cheat Sheet is the reference for doing uploads safely.
One more practical point: communicate the limits to respondents. A form that silently rejects a 12 MB file, or a .docx when you only accept PDF, just frustrates people and loses you the submission. State the accepted types and the size cap near the field, and show a clear error when something is out of bounds. Good upload UX is as much about telling people the rules up front as it is about enforcing them.
Build a File Upload Form with Forms Expert
If you'd rather not build and maintain the storage, validation, and retrieval yourself, a hosted form builder handles them. Here's how it works in Forms Expert, with the real defaults and limits so you can judge the fit, and the one genuine advantage over Google Forms.
The differentiator is that respondents don't need to sign in to upload a file, which removes the friction that costs Google Forms public submissions. You add a file field, pick a MIME preset (Documents, Images, PDF only, or Any), and the field accepts up to 5 files of 5 MB each by default. The maximum single-file size is tier-bound, and so is total storage and your monthly submission count:
| Plan | Max file size | Total storage | Submissions / mo |
|---|---|---|---|
| Free | 5 MB | 100 MB | 100 |
| Starter | 10 MB | 1 GB | 1,000 |
| Pro | 25 MB | 10 GB | 10,000 |
| Business | 100 MB | 100 GB | 100,000 |
Uploaded files are stored in S3-compatible storage, SHA-256 checksummed (to detect corruption or tampering), and filename-sanitised; you retrieve them from the submissions dashboard. To be straight about it, as covered above, there's no antivirus scan at intake, and anti-abuse is a honeypot, IP rate limiting, and CAPTCHA rather than malware detection. Over-limit submissions are rejected at submit time rather than silently dropped, so you'll know.
If you outgrow a plan's storage or file-size ceiling, the fix is moving up a tier rather than paying per upload, the same flat, predictable model as the rest of the product. For most intake and application forms, the default of 5 files at 5 MB comfortably covers resumes, PDFs, and photos without any configuration.
Where a hosted upload field shines is on forms that already do other work, an application that also collects a resume, an intake form that needs a document, a support request with a screenshot. File uploads pair naturally with conditional logic and multi-step forms (show the upload field only on a relevant branch), with multi-step forms (put the upload on its own step), and with save and continue for longer forms where people gather documents over time. For intake and lead capture forms specifically, collecting the file with the rest of the submission is the whole point. Start from the home page to build one.
Frequently Asked Questions
What is a file upload form?
A file upload form is a form that includes a file field, letting respondents attach one or more files, such as documents, images, or PDFs, along with their other answers. When someone submits, the files are uploaded and stored where the form owner can retrieve them, typically a dashboard, a cloud folder, or a notification with download links. It solves the common problem of collecting files from people who aren't in your systems: instead of asking for files by email, you capture a person's information and their files together in one organised submission. Job applications with resumes, support tickets with screenshots, and intake forms with documents are all classic file upload forms.
How do I create a form that lets people upload files?
You have three main routes. In plain HTML, add an input of type file inside a form with enctype set to multipart/form-data, then build a backend to receive, validate, store, and let you download the files, full control, but you handle the infrastructure and security. In Google Forms, add a File upload question, though respondents must sign in to a Google account. Or use a hosted form builder, which gives you a file field with built-in storage, type and size limits, and a dashboard to retrieve uploads, with no backend to maintain. Choose raw HTML for a one-off on a site you run, Google Forms for internal Workspace forms, and a hosted builder for public-facing forms you don't want to maintain.
How do I add file upload to a Google Form?
In the Google Forms editor, add a question and choose the File upload question type. You can then set which file types are allowed, the maximum number of files, and a size limit, and uploaded files are saved to a folder in the form owner's Google Drive. The important limitation is that respondents must be signed in to a Google account to upload, which is fine for internal forms where everyone uses Google Workspace but adds friction for public forms. If you need to collect files from people who may not have a Google account, a hosted form builder that doesn't require respondent sign-in is usually a better fit.
Can people upload files to a Google Form without signing in?
Not in Google Forms itself, file upload questions require respondents to be signed in to a Google account, and there's no native setting to turn that off. This is a common frustration for public-facing forms, because requiring a Google login adds friction and excludes anyone without an account. The usual workarounds involve third-party tools or add-ons, but the cleaner solution is to use a form builder whose file uploads don't require any respondent sign-in. Forms Expert, for example, lets anyone upload a file without logging in, which removes exactly the barrier that costs public Google Forms their submissions.
What file types and sizes can a file upload form accept?
That depends on how you configure it, and you should configure it deliberately. Restrict file types to what you actually need using a MIME allow-list (for example, PDFs for a resume or images for a photo upload) rather than accepting anything, which is both more usable and more secure. For size, set a per-file cap to control storage and block oversized uploads, a few megabytes per file is sensible for documents and images, with a higher ceiling only where you genuinely need it. In Forms Expert, the default is up to 5 files of 5 MB each, with the maximum single-file size depending on plan (from 5 MB on Free up to 100 MB on Business). Always enforce type and size on the server, since the browser's accept attribute is only a hint.
Are file upload forms secure?
They can be, but be precise about what secure means. Good practice covers storing files safely, sanitising filenames so a crafted name can't cause problems, recording a checksum to detect tampering or corruption, and limiting abuse with a honeypot, rate limiting, and a CAPTCHA. What it does not automatically include is antivirus scanning: many hosted form tools, including Forms Expert, do not run a malware scanner on every upload, so you should not assume a file is malware-free just because it arrived through a form. Forms Expert stores uploads in S3-compatible storage, SHA-256 checksums them, and sanitises filenames, but does not scan for malware. If you accept files from the public and that's a risk, run them through a dedicated scanner in your own pipeline before opening.
How do I receive the files people upload?
It depends on the tool. With a plain HTML form, your backend receives the multipart request and you store and retrieve the files however you've built it. With Google Forms, uploads go to a folder in the form owner's Google Drive. With a hosted form builder like Forms Expert, uploaded files appear in the submissions dashboard alongside the rest of each response, where you can download them, and you're notified of new submissions. The practical advantage of a hosted tool is that the files are automatically tied to the right submission and kept in one place, so you're not matching loose email attachments to the right person by hand.